
- Requirements
- Download and Installation
- Getting Started
- Review Form
- Import and Export Data
- Anti-Spam
- Notifications
- Structured Data (Rich Snippets)
- User Accounts
- Other Features
- Module
- Developer
JLex Review Documentation
Requirements
-
Joomla 3 to 6.
For Joomla 3, as it is no longer supported, if you wish to use this extension on that platform, please contact me and I will provide a dedicated installation package.
-
Regarding PHP configuration, the following extensions are required:
- ZIP Library
- GD Library
- cURL or
allow_url_fopenmust be enabled
(To check these requirements, go to System > System Information > PHP Information.)
Download and Installation
- Go to the JLexArt download page to get the latest version.
- Navigate to Joomla's extension installer (System > Install > Extensions), select the downloaded file, and start the installation.
- In addition to the component, JLex Review also includes modules and plugins. You can visit addons page to download those items.
Getting Started
JLex Review provides 3 ways to create a review page:
Create a standalone review page: This is an independent page where you can collect and display customer reviews/feedback.
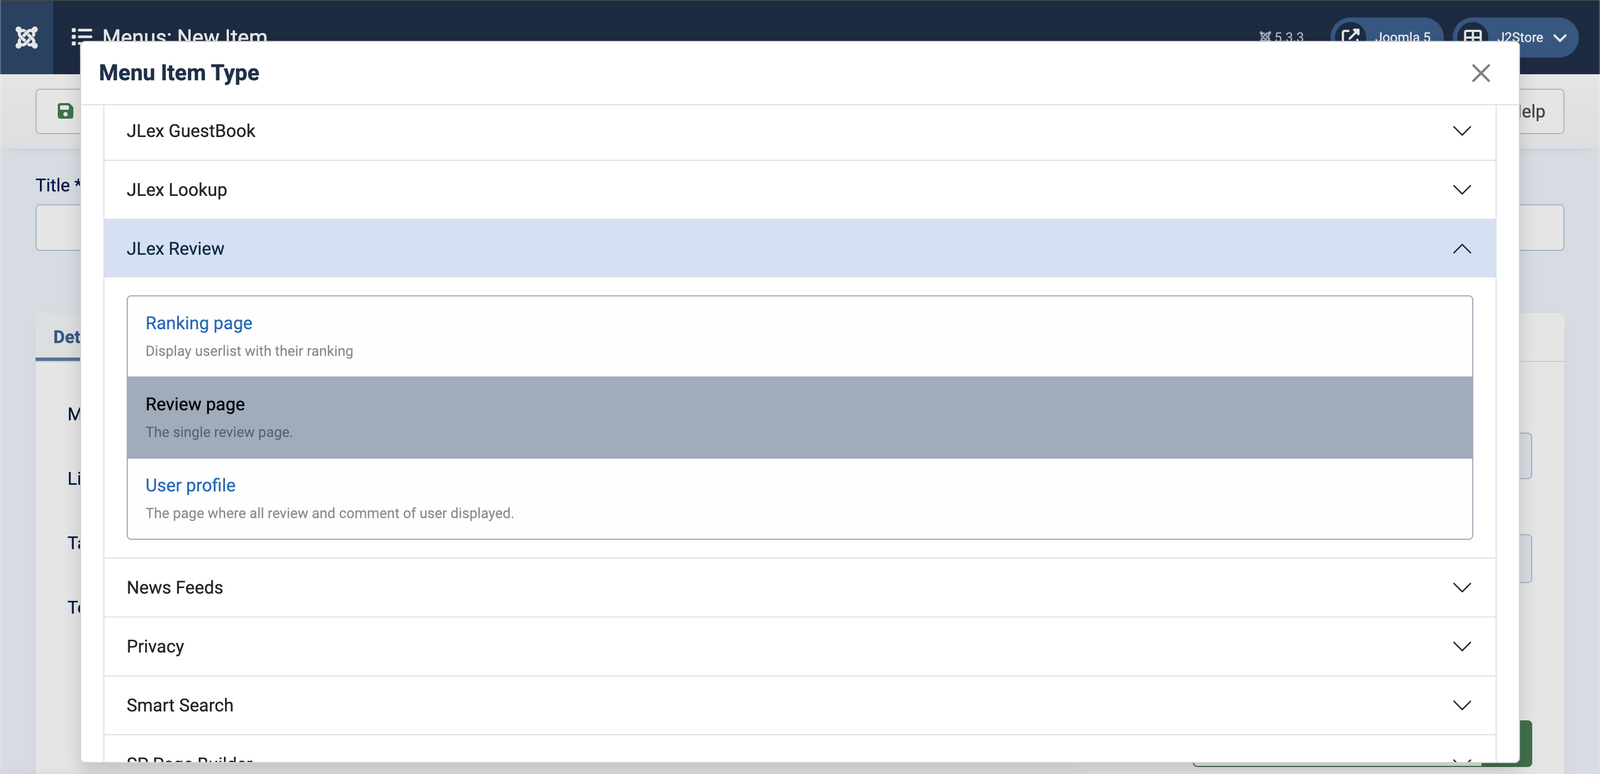
- To create the page, go to Menus > Main Menu (or your selected menu) > New
- In the Menu Item Type field, click Select > JLex Review > Review Page
- Then enter the title and alias for this menu item
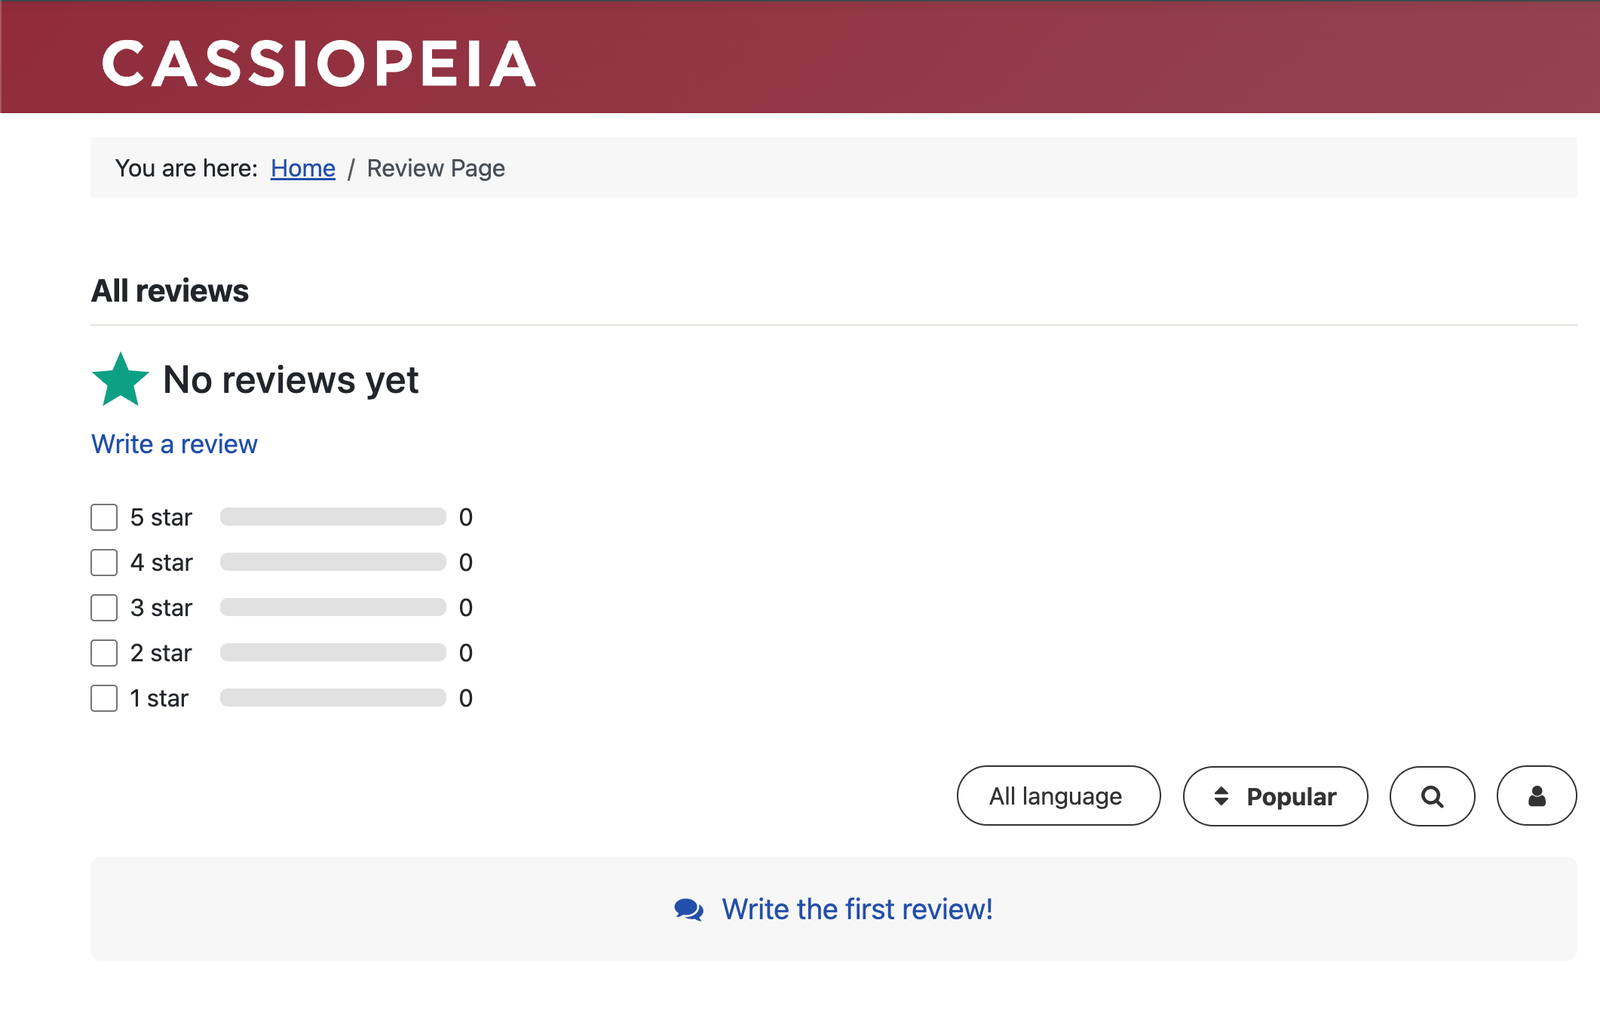
- On the front-end, access the menu you just created to view the result
 |
 |
Integrate with Page Builders
For Page Builders, you need to download the JLex Review module from here. Then install this module via Joomla's installer.
- Go to Module Manager and create a new module from JLex Review
- In the configuration page, select the feature Create a review page
- Set Item Source to Dynamic Item
(Tip: by using "Dynamic Item", you only need to create one module and embed it into any page built with a Page Builder.)
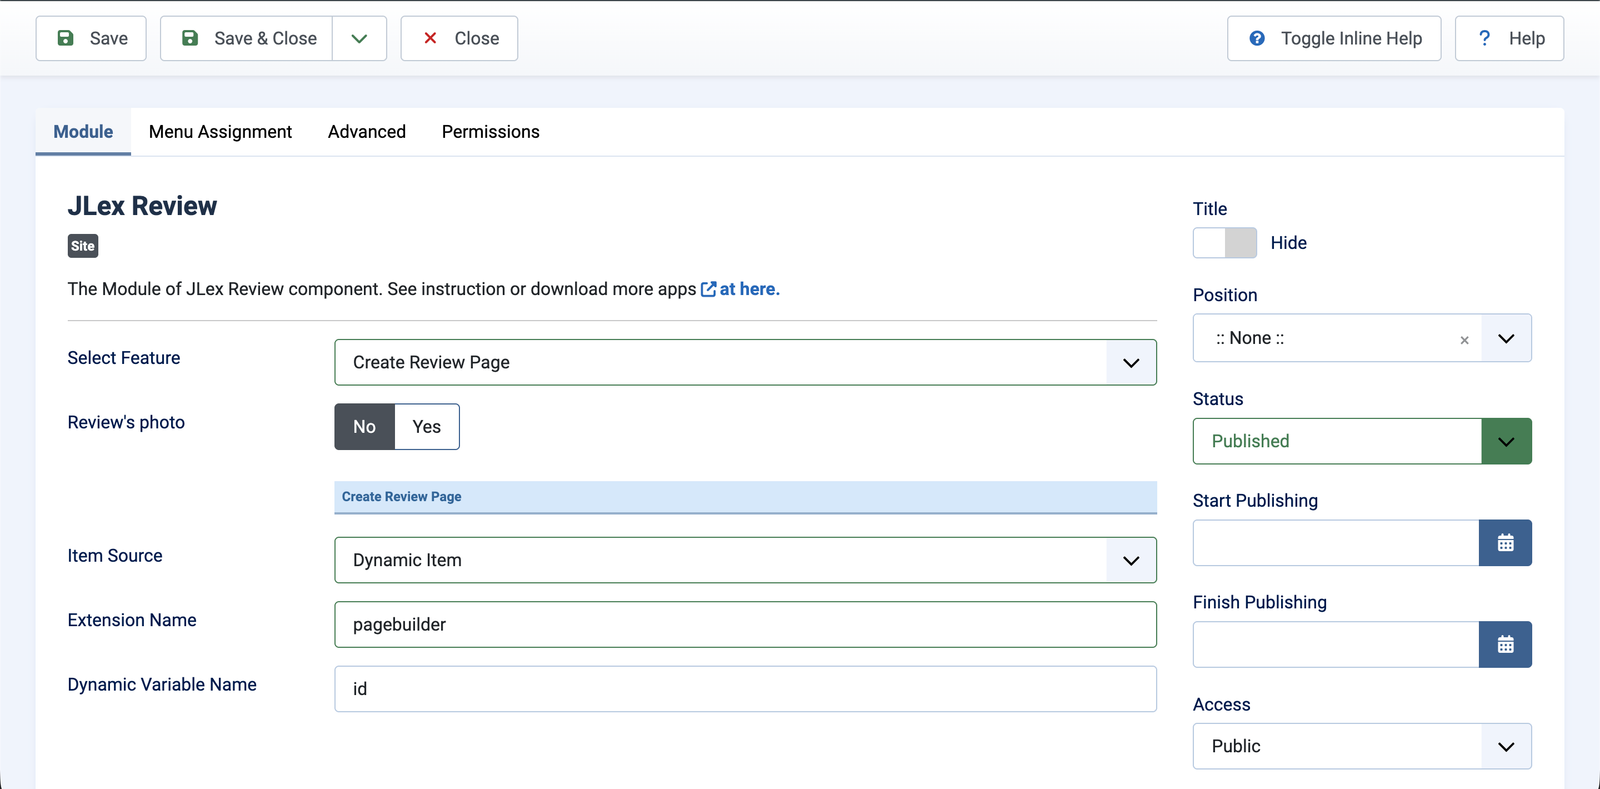
- Enter the Extension Name as the name of the Page Builder extension (only a-z, 0-9, and _ are allowed). Example: sppagebuilder, yootheme ...
- Set Dynamic Variable Name to id
Integrate across multiple pages (e.g., articles, products...)
To integrate across multiple pages in other extensions such as VirtueMart, Joomla Content, etc., you need to visit the JLex Review Addons page to download the required add-ons.
You can also refer to the developer documentation here. If the extension you are using is not listed, please contact us for support.
Review Form
The Review Form (called Section File in some older versions) is where you build the form. By default, the basic form includes: Headline, Rating Score, and Review. With JLex Review, it also supports additional fields such as Checkbox, Select, Text, Textarea, and Score. You can build the form based on your requirements, and there is no limit to the number of forms.

To create/edit a form, go to JLex Review > Configuration > Review Form. Then add, arrange, and configure the fields as desired.

To change the review form of a specific page, go to JLex Review > Items > Select the item > Review Form.
Note: The displayed data may not be accurate if the new form differs significantly from the old one.
Import and Export Data
Import Data
-
Import from an existing CSV file
The CSV file must contain at least the following basic fields: Created Date (format: YYYY-MM-DD HH:MM:SS), Review Content, and Author Name.
Once your CSV file is ready, go to JLex Review > Import & Migration and follow the instructions.
Note: Each import can only apply reviews to a single page. -
Migrate data from other extensions
Currently, JLex Review supports migrating reviews/comments from the following extensions: Hikashop, VirtueMart, JComment, and Komento.
To perform migration, go to JLex Review > Import & Migration > Migrators to begin.
Export Data
The exported file will be in CSV format and will include all reviews from a single page. To export data, go to JLex Review > Items > Navigate to the desired page > Export to CSV file

Bulk export across multiple pages is not supported due to inconsistencies related to review forms.
Anti-Spam
Captcha
CAPTCHAs provide challenges that are difficult for computers to solve but relatively easy for humans.
You can download available CAPTCHA plugins from the JLex Review Addons page. Each plugin comes with its own dedicated documentation.
JLex Review also supports Joomla Captcha. This means if you are already using a default CAPTCHA in Joomla, you can use it with JLex Review without needing our CAPTCHA plugins. To enable this feature, go to Configuration > Restriction > Joomla Captcha.
Blacklist
Blacklist is a feature used to block someone (either a registered user or a guest via IP address). Anyone on this list will not be able to submit reviews or comments.

Go to JLex Review > Blacklist to get started.
Reporting System
This is where you collect user feedback regarding reviews or comments that violate community standards.
To enable the reporting system, go to Configuration > Restrictions > Reporting and select the type you want to apply.
Additionally, you need to enable the reporting feature for users. Go to Configuration > Permission and check the Reporting option for the user groups you want to apply it to.
To manage reports, go to JLex Review > Report

Moderation Feature
This feature is used to prevent reviews and comments from being automatically published. Instead, publishing will be handled manually via the admin panel.
To enable this, go to Configuration > Permission and uncheck Auto publish review and Auto publish comment for the desired user groups. At this point, unapproved reviews will only be visible to the admin and the author. Other users will not be able to see them.
Tip: In addition to moderating manually from the admin panel, you can configure email notifications to speed up the process. When a new review/comment is submitted, a notification email will be sent to the administrator's inbox, allowing moderation actions to be performed directly via email.
Notifications
Administrator
After configuring admin notifications, the emails listed will receive alerts whenever a new review, comment, or report (optional) is submitted.
To set this up, go to Configuration > Notification > Admin Notification and fill in the required information.
For the Sending method parameter, you have two options: Send Immediately or Cronjob (Scheduled). If you choose Cronjob, you must configure it on your server. See details here.
Users
Users will receive notifications (on-site or via email-if Cronjob is configured) when someone interacts with their reviews or comments.
On the website, they will see relevant notifications when they log in and scroll down to the review section.

Advanced
JLex Review also supports follow and subscription features.

- Follow: Users can follow another member and receive notifications when that member submits a new review.
- Subscribe: Users can subscribe to a page and receive notifications whenever a new review is added to that page.
Setting Up Cronjob for Hosting/Server
A cron job is a time-based task scheduler in Unix-like operating systems (Linux, macOS) used to automate repetitive scripts or commands in the background.
Most hosting/server providers offer this feature, though the interface and steps may vary depending on the control panel.
After accessing the Cronjob management page, add the commands provided by JLex Review (Configuration > Notification > Cron Job Command).

Structured Data (Rich Snippets)
Structured data helps search engines better understand, categorize, and display your content. With JLex Review, it can show the average rating and total number of reviews directly in search results for the pages where it is integrated.
The structured data format used here is JSON-LD. To enable this feature, go to Configuration > General > Rich Snippets: Yes.
Schema Type is a required field. The default is Product, but you can change it to other types as long as they support the aggregateRating property. Some common schema types include:
- LocalBusiness
- Event
- Organization
- SoftwareApplication
- ... See more: https://schema.org/

If the page where you integrate reviews is already using Microdata and you only want to add the aggregateRating property, go to Configuration > Advanced > Only Average Rating: Yes.
User Accounts
JLex Review user data is synchronized with Joomla. In addition, it supports integration with other extensions as well as social media login/registration.
Joomla Extensions
With these integrations, it can sync user avatars and profile links (if available). Supported extensions include:
- JLex Comment
- Easyblog
- EasySocial
- EasyDiscuss
- EasyProfile
- K2
- CB
- Gravatar
- Jomsocial
- Kunena
- Joomla Custom Field (avatar only)
To enable synchronization with these extensions, go to JLex Review > Configuration > User > Integration.
Social Login / Registration
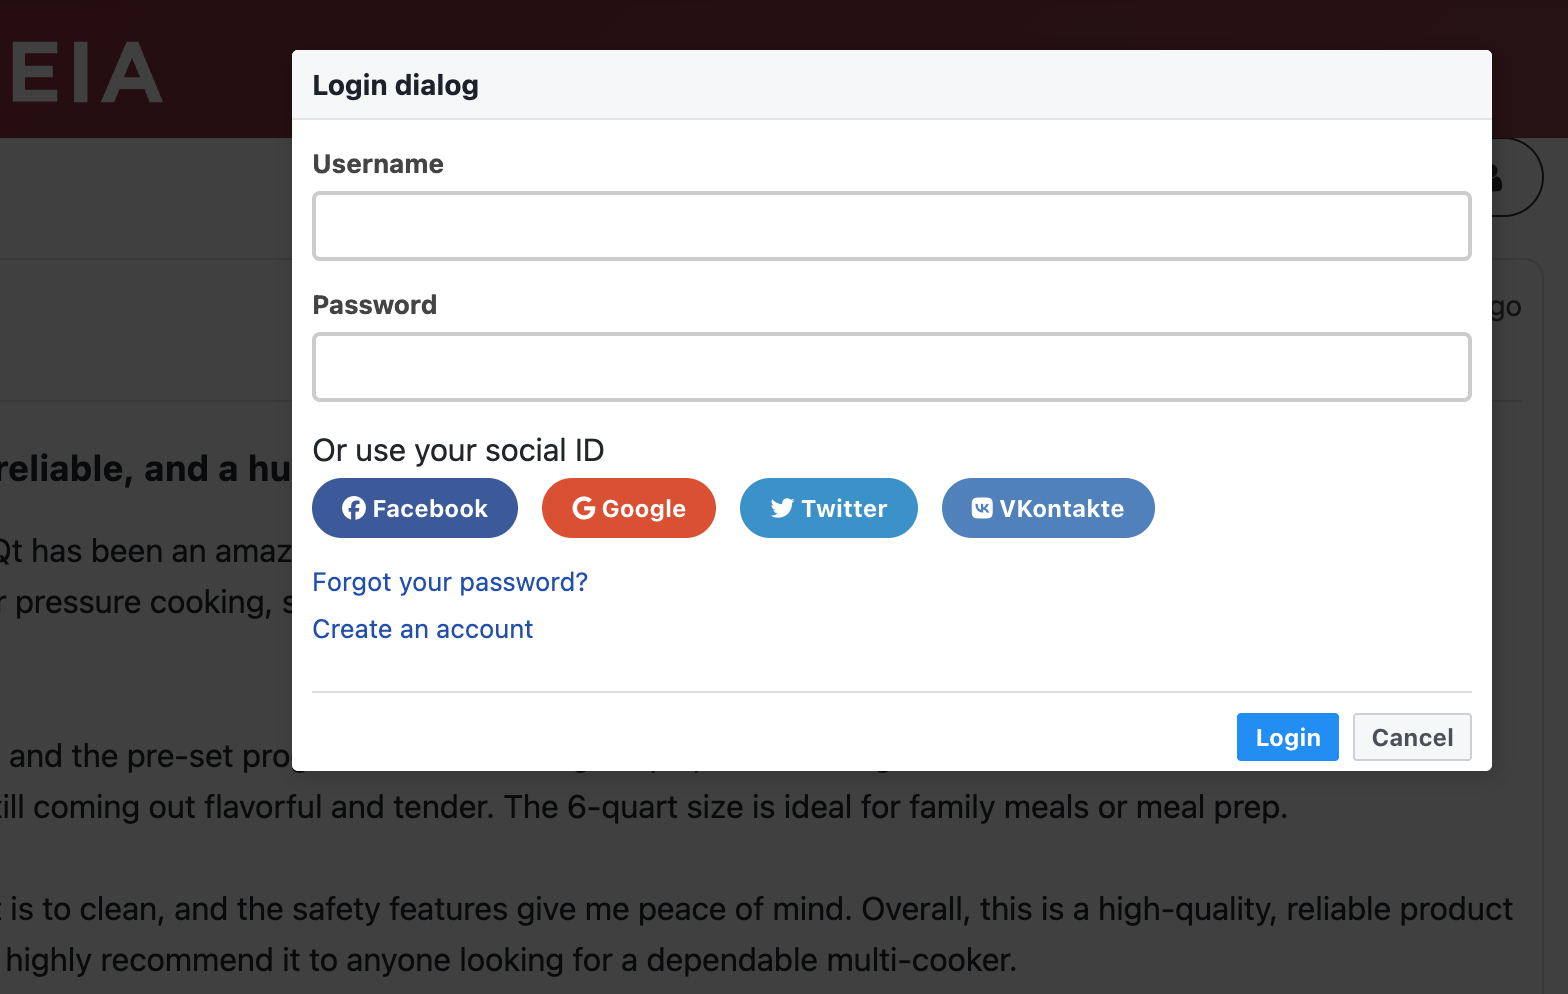
- To enable it, go to Configuration > User > Facebook OAuth > Yes
- Then go to the Facebook (Meta) Developer site and create a login application. Ask ChatGPT.
- Add all OAuth Redirect URIs to the list of valid URLs in your Facebook app
- Fill in the required information
- Once completed, copy the App ID and App Secret and enter them into JLex Review
Twitter (X)
- To enable it, go to Configuration > User > Twitter (X) OAuth > Yes
- Then go to the Twitter (X) Developer site and create a login application. Ask ChatGPT.
- Add the Callback URL from JLex Review into your X app
- Fill in the required information
- Once completed, copy the API Key and API Secret and enter them into JLex Review
- To enable it, go to Configuration > User > Google OAuth > Yes
- Then go to the Google Developer Console and create a new project. Ask ChatGPT.
- Add the Google Redirect URIs from JLex Review to your project
- Fill in the required information
- Once completed, copy the Google Client ID and Google Client Secret and enter them into JLex Review
VKontakte
- To enable it, go to Configuration > User > VKontakte OAuth > Yes
- Go to the developer page and create a new application. Ask ChatGPT.
- Fill in the required information
- Copy the Application ID and Secure Key into JLex Review
Other Features
- Template: Switch the interface layout. By default, JLex Review provides 3 template packages. You can customize or create new templates. See more here.
- Terms of Use: Add your website’s terms of use. Users must agree to these terms before submitting a review.
- Emoticon: Enable/disable the emoji box for comment or review input fields.
- Title & Link Source:
When integrating JLex Review with other extensions such as Joomla Content, VirtueMart, etc., items from those extensions (e.g., articles, products) will appear in the Items section.
JLex Review items will include the title and link to those external items. If the title or alias of those items changes (which may affect the URL), you will need to synchronize them with JLex Review. This can be done manually or automatically.
Sync and Router file are automated methods, but they currently support only popular extensions. If your extension is not listed, please contact us for assistance.
- Language Filter:
If your website supports multiple languages, enable this feature so users can filter reviews by their preferred language or display only reviews in the current language.
To enable it, go to Configuration > General > Language Filter: Show
To display only reviews in the current language, go to Configuration > Advanced > Language Filter: Yes

- Embed: Embed the overall rating summary of a page into another website. When this feature is enabled, an embed button will appear in the review section. Users can enter it and select the options they want to embed on their site.
Note that you must configure your server to allow iframe embedding.

- Number of Stars The maximum number of stars users can give. The default is 5. To change it, go to Configuration > Review > Number Star.
-
Roles: Labels used to assign roles to user groups. For example, you may want to label admins, moderators, or even customers who have purchased products on your website (advanced use case).
To set this up, go to JLex Review > Roles to create roles. Then go to Configuration > Review > Roles: Enable.

- Rating Without Review: This feature allows users to leave a rating score without writing a review. To enable it, go to Configuration > Reviews > Rating Without Review: Yes.
-
Rating Label: Attach labels to ratings based on score values. For example: 1 star = Poor, 2 stars = Bad, 3 stars = Average, etc.

These labels can also replace the default labels in the rating summary panel. To configure, go to Configuration > Reviews > Rating Label: Yes.
Then define values in Rating Label Data. There is no limit to the number of labels. The range must start from 0 and end at 100, and the labels must be continuous. See the example below:

- User's Max Rating: By default, each user can submit only one review per page/item. You can change this to a desired value or set it to zero to remove this limitation. Go to Configuration > Restriction > User's Max Rating.
- Bad Word Filtering: Enable/disable the filter for prohibited words. These words can be censored or completely hidden depending on your settings. To configure, go to Configuration > Restriction > Bad Word Filtering.
- Check Guest Name: Sometimes guests may impersonate others (e.g., site owners). This feature helps prevent such cases. Go to Configuration > Restriction > Check Guest Name to enable it.
-
Ranking Page:
Enable this feature to create a page that ranks users based on their contribution score. Scores are accumulated through actions such as writing reviews, posting comments, and liking/disliking reviews.

To enable, go to Configuration > Ranking Page: Enable.
To create the page on the front-end, go to Menus > Main Menu (or another menu) > New > Select Menu Item Type as JLex Review > Ranking Page.
-
User Profile:
If you do not want to sync user profiles with other extensions, JLex Review also provides its own profile page. On this page, all user activities (related to JLex Review) are displayed, and users can update their avatar, etc.

To enable this feature, go to Configuration > User > Profile Page: Yes.
To set the profile page URL, go to Menus > Main Menu (or another menu) > New > Select Menu Item Type as JLex Review > User Profile.
At that point, all profile URLs will follow the format: /menu-alias/username-id
-
User Permissions:
User permissions are divided into two groups: Users and Administrators. Administrators have additional privileges that regular users do not have. To get started, go to Configuration > Permissions.
User Admin Write/Edit/Delete Review Edit/Delete Any Review Media: Upload Files Edit/Delete Any Comment Download File Show author IP/Email address Location Sharing Publish/UnPublish Any Review Helpful Voting Featured/UnFeatured Any Review Automatically Publish Review See Hidden Content
If the review form contain private inputAutomatically Publish Comment Write/Edit/Delete Comment Reply Comment Reporting Subscribe Item Follow User - Email Field: Enable/disable the email field when guests submit reviews or comments. Go to Configuration > Advanced > Email Field to enable it.
- Custom CSS / Custom JavaScript: Inject custom CSS/JavaScript into JLex Review pages. Go to Configuration > Advanced to add your code.
-
Bridge
Used to display the review page of the main item above the sub-item. Often used in multilingual websites where each language has a separate article (different ID).
For example, you have articles A, B, and C. You want to display a review page above these articles, including all the reviews from these three articles. This means that when a user accesses A, they will see reviews from B, C, and A itself. Similarly for B and C. This is where the "Bridge" feature comes in.
First, you need to identify a main article. Here, we'll use A. B and C are the sub-articles.
Go to JLex Review > Bridge > Add New:
Here, you will see four items:
- Main Item
- Sub Item
- Title: Title of the sub-article (optional).
- URL: URL of the sub-article (optional)
Main Item: <Object Name>,<Object ID>
For example, article A has ID=3, the Main Item is content,3Similarly, for Sub Item: <Object Name>,<Object ID>
For example, article B has ID = 4, the Sub Item is content,4
Module
The JLex Review module can be used for:
- Top items ranked by rating score
- Newest reviews
- Creating a review page
- Item rating statistics
Download and view more documentation for the module here.
JLex Review also supports positions where you can insert other modules. These positions include:
- jr-top
- jr-before-list
- jr-after-list
Below is an illustration of these positions:

Developer
Before read these sections, make sure you know PHP language firstly.
Replacer
Using to replace a string in review or comment by another string (allow HTML).
Example: You want to preview image based link attached in review
Go to JLex Review > Replacer > New to add new replacement item. Fill form as image below:

In addition, you can attach CSS or Javascript for each replacement item.
Synchronization
This part will solve some issues eg:
- Sync title & url of item in JLex Review when it is changed by parent extension
- Make something when the rating of item is changed
- Author of item will be subscribe automatically, and they will receive a nofitication when someone post a new review.

We will go to a specific example...
You have integrated JLex Review with K2, and now you want solve above issues.
First, you need access to Synchronization menu in back-end. Click "New" button to go Sync form.
At here, you will see 3 corresponding items to solve the above problems.
- Update entry details
- Callback when entry rating is updated
- The author keeps track of their posts
Firstly, you need set value of Object field is k2 (lower).
Update Entry Details
Global variable: $object_id. In this part, you need write a program to get title & link of K2 item. The ID of K2 item is $object_id
Return an array include two properties title and url, return deleted (string) if item not found.
Callback When Entry Rating Is Updated
If rating of item is changed and you want make something (eg: update value of a field of database). Global variable include $object_id, $rating, $rating_count, $review_count. The ID of K2 item is $object_id
The author keeps track of their posts
When author post an article, you need click to subscribe button to get latest review about this article. It will better if system auto add this user to subscription list.
In order to do that, you need enable The author keeps track of their posts. In Code editor, you need write a program to get USERID of author based on ID of item (here is $object_id).
Templates
Install New Themes
In order to create new theme, you should do following steps:
- Go to directory: components/com_jlexreview/templates
- Copy default forder and rename by new name.
- Now, you can custom your theme by modify file in this folder
- Last, Go to Configuration > General > Theme > Select your theme
Template Overrider
JLex Review sub-templates extend the templating capabilities of Joomla! by allowing the creation of multiple, named sets of view overrides for JLex Review (the component) and certain JLex Review modules.
JLex Review component sub-templates are created by copying the contents of /components/com_jlexreview/templates/ to /templates/DEFAULTTEMPLATE/html/com_jlexreview/, where DEFAULTTEMPLATE is the name of your site's default template.
Each template pack will include:
- |_comments
- |_default_comment.php
- |_default_comments.php
- |_form
- |_default.php
- |_others
- |_profile
- |_default.php
- |_ranking
- |_default.php
- |_rating
- |_default.php
- |_reviews
- |_default.php
- |_default_form.php
- |_default_review.php
- |_default_summary.php
- |_default_toolbar.php
Email Template
All email templates stored in path administrator/components/com_jlexreview/libs/emails
This folder include 4 files:
- admin.tpl.php Notify to admin when a review or comment added/modified
- follow.tpl.php Notify to user who are followed reviewer where the reviewer have a new review.
- subscribe.tpl.php Notify to user who subscribed an item when item have a new review.
- user.tpl.php Notify to user when someone comment their review or comment
You can clone this folder to create new email template but must enter new directory in Configuration > Notifications > Email Template Path.
Integrate with Other Extensions
Same as popular components like as JLex Comment, JComment, Komento... JLex Review allow you integrate it to your component. It contain two parts:
Mini-star Icon
Using to display average rating (or criterias) of item
<?php
$loader = JPATH_ROOT . '/components/com_jlexreview/load.php';
if (file_exists ( $loader )) {
    require_once $loader;
    echo JLexReviewLoad::quick_init ( $extension, $id );
}
Parameters:
- $extension: (type:string) - name of component (without com_ prefix) : k2, virtuemart or easyblog ....
- $id: (type:integer} - ID of item (maybe is article, blog item...)
Example:
<?php
$loader = JPATH_ROOT . '/components/com_jlexreview/load.php';
if (file_exists ( $loader )) {
    require_once $loader;
    echo JLexReviewLoad::quick_init ( 'k2', $item->id);
}
Review Body (Form + Reviews)
Put code bellow where you want show review body.
<?php
$loader = JPATH_ROOT . '/components/com_jlexreview/load.php';
if (file_exists ( $loader )) {
    require_once $loader;
    echo JLexReviewLoad::init ( $title, $extension, $id , $section_id );
}
Parameters:
- $title (type:string) - name of reviewed item. If this param is blank, the JLex Review will find title automatically
- $extension (type:string) - name of component (without com_ prefix) : k2, virtuemart or easyblog ....
- $id (type:integer} - ID of item (maybe is article, blog item...)
- $section_id (type:integer | default:0} - Use it if you want create multiple different review/commenting systems
<?php
$loader = JPATH_ROOT . '/components/com_jlexreview/load.php';
if (file_exists ( $loader )) {
    require_once $loader;
    echo JLexReviewLoad::init ( $this->item->title, 'k2', $this->item->id , $this->item->category->id );
}